Last week saw my app, Sun to Moon Sleep Clock, updated with a new and slightly unusual feature - a hologram mode. The only catch is that you need to build the hologram viewer yourself from cardboard and a few other basic materials. Full instructions can be found at http://www.msibley.com/sleep-clock-stand where you will also find a YouTube run through.
The viewer consists of 2 elements, a cardboard stand for displaying your iPad or tablet at a convenient viewing angle and the hologram adapter which attaches to the stand when the app is in hologram mode.
If you have a go at building either the stand or the viewer I'd love to hear how you get on!
Update August 2016: This app now has a new home at http://www.msibley.com/sleep-clock/ where you'll find full usage instructions and latest features
Update March 2016: I have just added a couple of new features including:
• Soothing sleep sounds with adjustable timer that plays after sunset. Choose between whale song, white noise (hair dryer), breaking waves or off.
• Audible sunrise alarm. Choose between digital alarm clock, birds singing or off.
It's been over two years since the release of my original Sun clock, in which time I have had numerous feature requests and ideas from users so I felt it was time to give it an update. The app has now become Sun to Moon Holo Sleep and as well as some new features I am also releasing an iOS version to accompany the Android version.
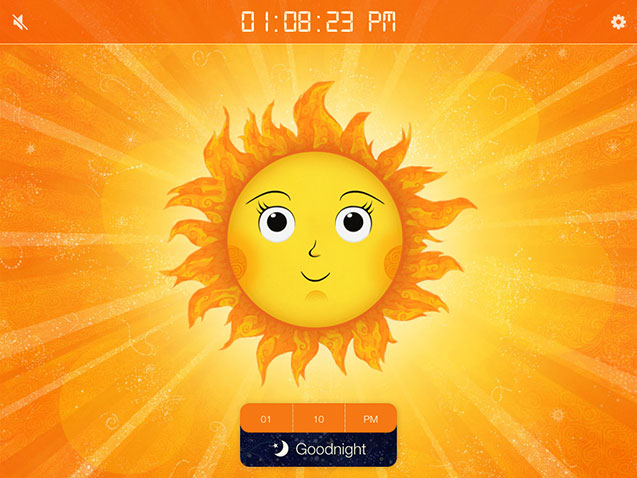
Continuous Sunrise/Sunset times
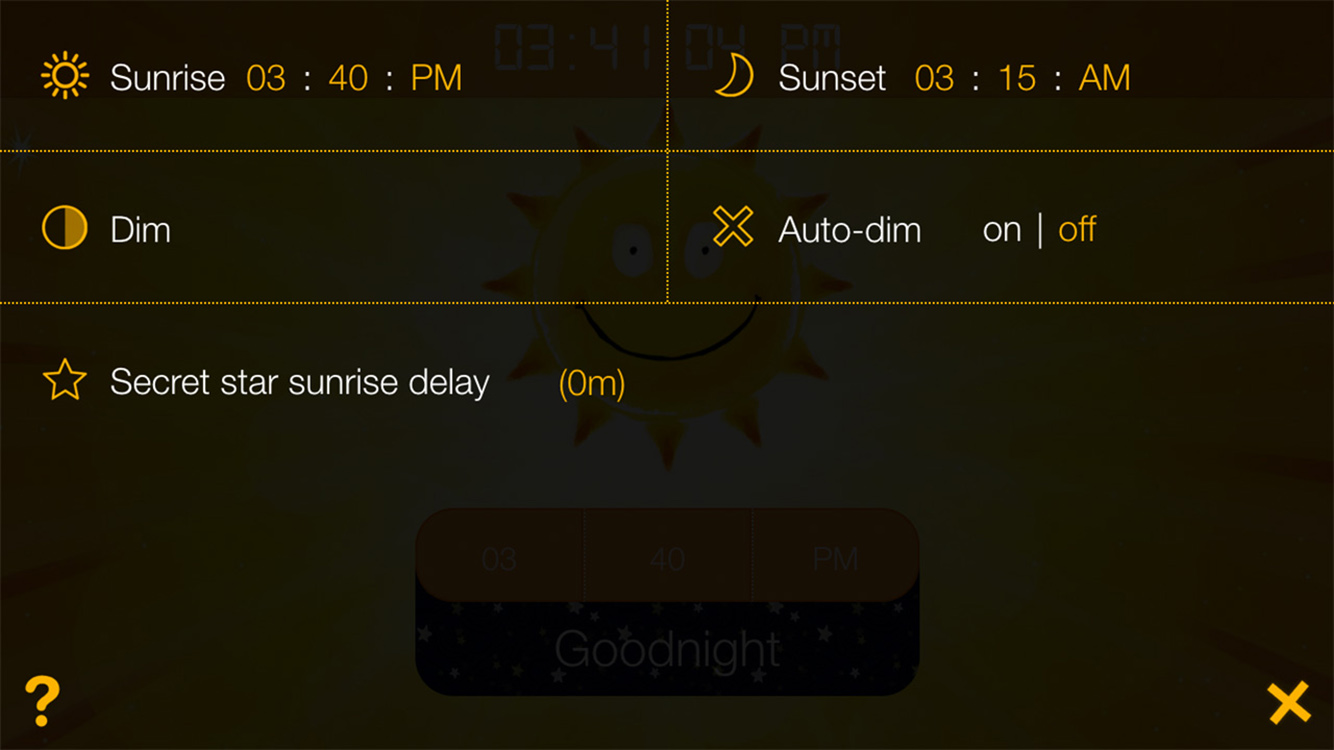
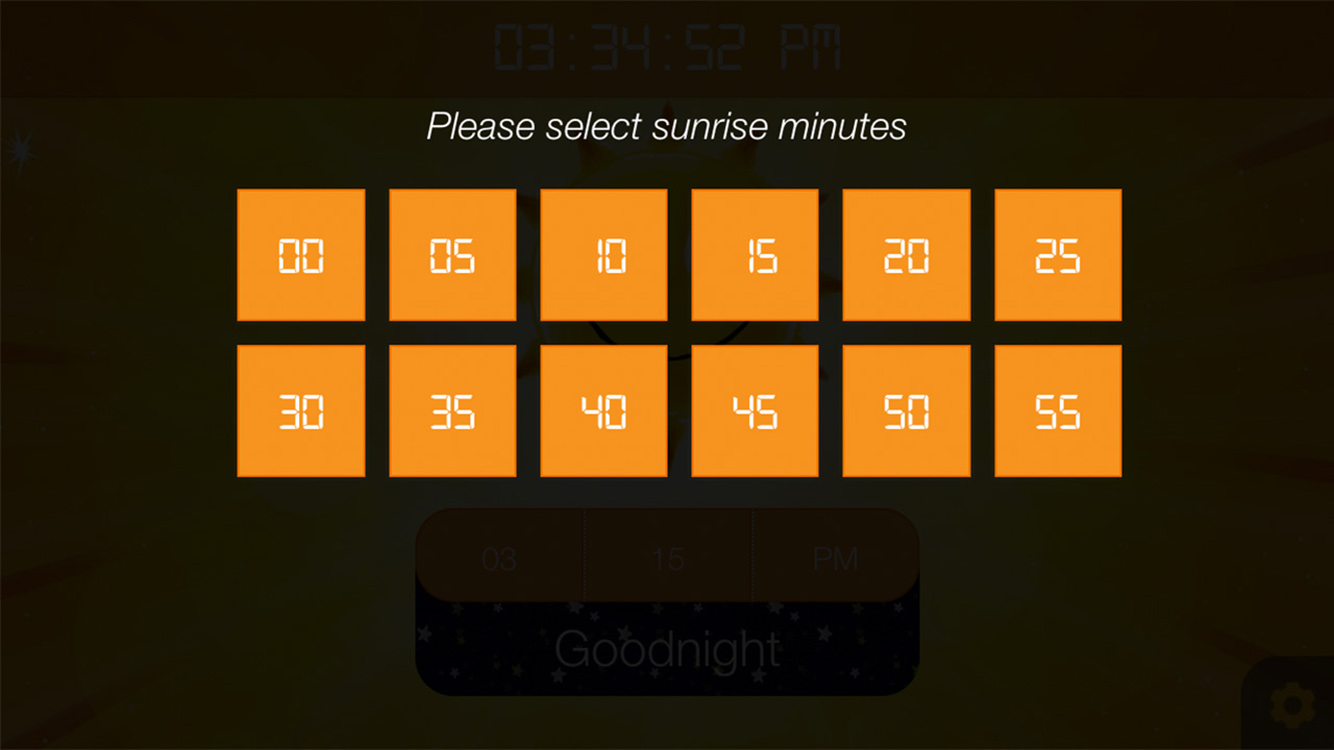
Sunrise and Sunset can both be set by touching the clock digits on the settings page and selecting from the hours, minutes and AM/PM selector. The clock will adhere to this settings on a continuing daily basis although Sunrise time can also be changed from the main daytime page and the 'Goodnight' button clicked for an immediate sunset.
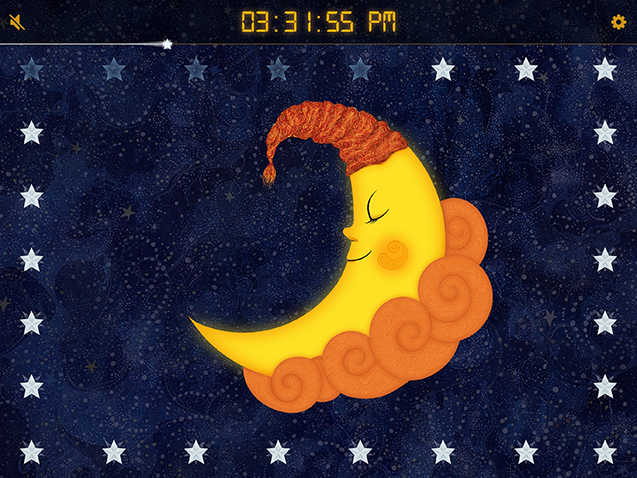
Shooting star progress bar
Sometimes it can be a bit hard to work out how many stars have gone and how many were there at the beginning so I have added a shooting star progress bar underneath the time display. Once the star reaches the right hand side of the screen you know that the sun is about to rise.
'Secret Star' sunrise activation button
One request I received on numerous occasions was to have some way of activating an early sunrise without having to delve into the settings or draw attention to the fact you are changing the wake-up time in front of your children. I have added a star with a reddish tint which is the Secret Star which can be touched at any time to activate an early sunrise. The delay between touching the star and sunrise can be adjusted from the settings.
Auto dim
Whilst it can be nice to have some light in the room from the clock whilst the children are going to sleep, I decided to add an auto-dim feature so that the screen is now able to dim itself half an hour after sunset/sunrise and brightened up half an hour before. This can be turned on and off from the settings from where you can also activate a manual dim.
Saved settings
One big short coming of the original app was that you had to reset the time every time you used the app. The new app saves all settings from the previous session including sunrise and sunset times, Secret Star delays and dim settings.
Comments (closed)
Hi there,
I purchased your app yesterday but I am struggling to get the sun to set. The set up was so easy and yet the clock still shows the sun even hours after bed time but I have no idea why. I tried restarting the app, even restarting my iPad. I took a few screenshots to show how the clock doesn’t match the settings - I can email them to you if tell me how. Thanks!
Posted by Kat on Sunday, 20th March 2016 at 4:02AM
Hi Kathleen, Sorry to hear you are having problems. I have tested the time setting process out on a few people and realised that instinctively people tend to get the sunrise and sunset time setters mixed up due to the fact I have placed the sunrise setter first followed by the sunset setter - I will switch them around in the next release. Could you check if this is what you have done. If this is not the problem then please could you email me at michael@siblify.com and I can reply direct from there.
Posted by Mike on Sunday, 20th March 2016 at 8:28AM
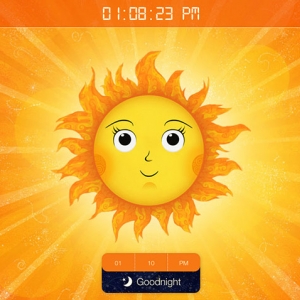
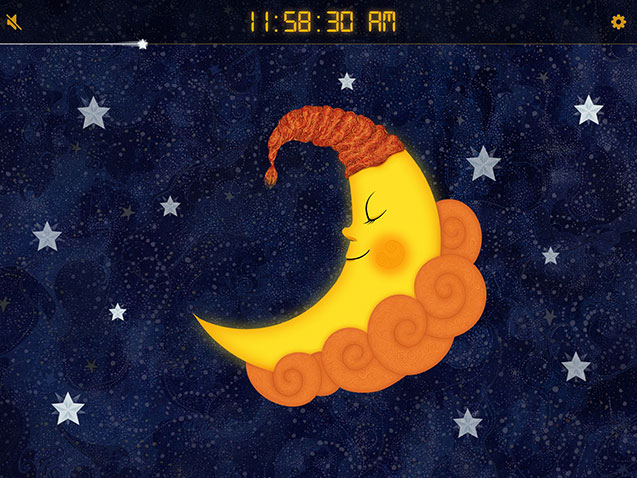
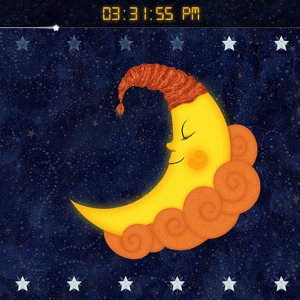
Sun to Moon Sleep Clock is an interactive night clock app that helps make bedtime more fun and consistent for kids. With a star countdown, visualised sunrise, collectable snooze rewards and gifts for the Sun and Moon characters, it makes gauging the time until morning much easier whilst offering a few gentle incentives to stay in bed till morning.
In its simplest form you just set the wake-up time then click the 'Good night' button to switch the clock to night mode, but there are also options for setting sleep sounds, wake-up sounds, reading times etc.. depending on your requirements. You can also customise the artwork by collecting snooze rewards which are exchanged for gifts for the Sun and Moon characters including hairstyles, accessories, face paint, custom counters and more. The app can also be tailored for special events such as Christmas, birthdays and Easter to help build excitment whilst averting the dreaded 4am wake-up call.
All the artwork used in the app is custom made in a style that has evolved from my life as an artist.I will continue to add functionality and new artwork whenever I get the time, so feel free to email me with suggestions!
Sun to Moon Sleep Clock is available for Android, Amazon and iOS devices. It can also be used completely free as part of the Amazon Underground scheme. Full details can be found at msibley.com/sleep-clock or you can download it using the links below:
Comments (closed)
Thank you! You just saved our sleep (foolish parents who forgot gro clock on night away)
Posted by Daze on Saturday, 11th October 2014 at 7:09PM
You’re welcome. I know that feeling!
Posted by Mike on Saturday, 11th October 2014 at 9:39PM
Thankyou so much! Your app is awesome!
Posted by Stacey on Tuesday, 2nd February 2016 at 5:31AM
This app is amazing, but I have one suggestion that would really make it perfect for our situation. I would like the sleep sound to keep running even after the wake/sun time starts. We have 2 kids sleeping in the same room, and would like out toddler to know its ok to come out of his room, but leave the sleep sound running so our baby can sleep undisturbed. We currently have the sleep sound timer set to infinite, but it silences once the wake up time is reached.
Posted by Mark on Wednesday, 12th April 2017 at 11:24PM
Hi Mark,
It’s great to get ideas for the app from people who are using it in different situations to my own. I think I could make this work by having an option to select the current sleep sound as the wake-up sound and vice-versa - just in case anyone wants to sleep to the sound of Bongos! That would enable you to have a sleep sound that effectively continues after sunrise.
I am currently working on some new artwork for the app so it may be a few weeks before I can roll this out but I’ll definitely include it in the next release.
I hope you don’t mind me asking but if you are finding the app useful, would you be willing to leave a rating? I only ask because despite lots of people using the app it has proved really hard to get much feedback and it really helps me promote the app as well as encouraging me to keep developing it. No worries if not but I just thought I’d ask.
Thanks for the suggestion and let me know if you think of anything else!
Michael
Posted by Mike on Thursday, 13th April 2017 at 8:14PM
We have two children in the same room, and would like them to look at the iPad to see if there is a sun og a moon to know if it is time to get up or not (and avoiding them yelling “I’m awake! Is it morning? And waking up the other). We don’t need any sound, necessarily, just the picture/light.
Is your app for us?
Posted by Ingelinn Chemosop Strømme Sivertsen on Monday, 7th August 2017 at 8:52AM
Hi Ingelinn. It sounds like it is what you need and can perform a similar task to the product you linked to. We have found that our children stick to the Sun/Moon sleep cycles pretty well and won’t get out of bed until Sun arrives. One issue a few parents have raised is that their children can be tempted to play on the device when they should be sleeping. This is not a problem we have ever had with our 2 so it really just depends on the individuals and maybe a physical clock would be better if your child is too distracted by having a tablet in the room at night. I have also designed a DIY stand/case to help with this issue at http://www.msibley.com/sleep-clock-stand. All sounds can be turned off in the settings and you can customise the artwork if you want 😊 Hope that helps but let me know if you have any more questions. Michael
Posted by Mike on Monday, 7th August 2017 at 9:09AM
Hi! I just bought the app! I love it. It has such great customizations. The only question I have is it would be great if we can make the actual time bigger than the moon or sun icon. Maybe a setting to be put in to make it half the screen size and shrink the sun or the moon? Or someway to make the digits bigger? Thanks!
Posted by Shawn on Saturday, 11th August 2018 at 11:34PM
Hi Shawn,
What a great idea - thanks for sharing your experiences with me. It’s really useful getting people’s feedback and helps me figure out what would actually be useful, so let me know if you have any more ideas. I will try and implement a ‘big digits’ mode for the next release!
Posted by Mike on Sunday, 12th August 2018 at 7:45PM
Hi I got this app for my son who is 6 and has autism. He used a gro clock as a trial and it seemed to help. When we had to give the clock back I found this app to replace it which is great as he has his own tablet but my problem is that he can just turn it off by pressing the back or the home button if you could make it so it needs a parent password to wake up and leave the app that would be great. Many thanks
Posted by melanie brabin on Wednesday, 9th January 2019 at 3:59AM
Hi Melanie,
Thanks for your comment and this is definitely one of the most common requests for my app. Whilst it is not possible to fully lock a device from within an app, most devices (unfortunately Kindle Fire devices are not included in this) offer a way to lock down the device to a single app from the settings. It is called kiosk mode and this article (https://www.bouncepad.com/knowhow/lock-ipad-tablet-kiosk-mode/) offers good instructions for setting it up on various device types.
I hope this helps and that the app is useful for your son.
Michael
Posted by Mike on Wednesday, 9th January 2019 at 8:16AM
Thank you for this app! I’ve bought it and am currently loading it to my 4 year old’s iPad. It will be tonight’s experiment. While he’s been decent about sleep he’s just started getting up at 4am and we hope this will help. One suggestion - for the big digits clock option it would be nice if the seconds could be disabled. It’s quite distracting and I’m imagining my 4 year old will make a game of watching them count. We’ll disable the clock for now but since we’re also trying to teach him numbers and time we’d love to have the clock on.
Posted by Leah on Saturday, 2nd February 2019 at 6:50PM
Hi Leah. Thanks for your comment and for installing my app. Having the option to remove the seconds counter is a really good suggestion and something I hadn’t thought of before so I appreciate you bringing it to my attention. As it happens I am working on an update for the app at the moment which I hope to push out in the next week or so. I’ll see if I can include your idea in that release. In the mean time I hope the app works out for you and buys you some extra sleep!
Posted by Mike on Saturday, 2nd February 2019 at 9:37PM
UPDATE 31st October 2014: With the release of Coda 2.5 the Channel entry tag gained a red background. You can remove this by importing the Coda EE2.sss file that has been added below. Drag the file to your Coda icon in the dock and select 'Coda EE2' from the dropdown menu that appears. Close the preference window and your tag should be restored. I have also updated the syntax mode with some of the newer EE2 tags.
UPDATE 3rd August 2012: The original version of this syntax mode stopped working with the Coda 2.0.2 update. The latest version should restore functionality.
I've been Googling 'ExpressionEngine syntax mode for Coda 2' almost daily for the last few weeks in the hopes that someone would come up with an EE2 syntax mode for the brilliant new code editor from Panic and put me out of my misery, but so far I've been left wanting.
As an act of desperation I decided to have a go at putting something together myself using existing syntax modes as a base from which to start. After a bit of trial and error I have come up with something which works well enough to get me through until someone who knows what they're doing releases something better.
So far I have enabled basic syntax highlighting for ExpressionEngine 2 tags / parameters and added auto-completion for most standard ExpressionEngine tags, variables and parameters along with some Structure tags for good measure. The mode imports the built-in modes for HTML, PHP and Javascript so in theory these should all be highlighted correctly as well.
Feel free to download it and try it out it but please bear in mind it is only a stop-gap measure and is by no means perfect. If you have any good suggestions as to how it could be improved, leave a comment below and I will try and update it when I get a moment to spare.
To Install
Download and unzip the syntax mode then place ‘expressionengine.mode’ in ‘User > Library > Application Support > Coda 2 > Modes’ and restart Coda 2. You can use any of the default colour stylesheets ('Coda > Preferences > Colors') although it was developed using Coda Bright. You could also export, adapt and re-import any of these stylesheets to colour it to your taste. I have added the stylesheet that I use below - it is more or less identical to Coda Bright except I have made the 'channel entries' tag and 'channel forms' tags bold. Add it by dragging the .sss file to the Coda logo in your dock and selecting 'Coda EE2' from the dropdown menu.
1.1 - Fixed autocomplete for closing channel entries tag. Adjusted class for != and = signs.
1.2 - Updated to work with Coda 2.0.2
1.3 - Updated for Coda 2.5 and with latest EE tags
Comments (closed)
Thanks so much for putting this together, it’s so nice to have my PHP and EE tags coloured. Perhaps if you could put it up on Github, people could collaborate on it? 😊
Posted by Mazil on Monday, 9th July 2012 at 12:14AM
That’s fine - glad it is useful. I had thought about doing that but was a bit hesitant because some of the code came from other syntax modes which weren’t my work. Maybe I’ll try and track down the sources for all the snippets that I borrowed and see what they think. That said, if anyone does improve upon what I have uploaded please feel free to feed it back and I can update the link.
Posted by Mike on Monday, 9th July 2012 at 1:44PM
Thank you very much, Michael! Very nice to have this for Coda 2.
Posted by Wolfram on Wednesday, 11th July 2012 at 9:19AM
Thanks for putting this together! I definitely missed the EE syntax highlighting after switching from CODA1 to CODA2. Is there a dark version?
Posted by Mike on Wednesday, 11th July 2012 at 12:23PM
Hi Mike. Whilst there isn’t a specific dark version, the syntax mode picks up on CSS classes used by Coda’s included stylesheets under Coda > Preferences > Color. The ‘Specials board’ stylesheet is dark but it may not be to your taste.
It is really straight forward to create your own color scheme though, just export out an existing stylesheet, change the extension to .css and edit the styles to the colours you want. When you have finished, change the extension back to .sss and import it back as a new stylesheet. It may take a bit of trial and error to work out which class effects which types of syntax but it should be fairly painless!
Posted by Mike on Wednesday, 11th July 2012 at 12:42PM
I have his installed in the correct folder and the ExpressionEngine syntax mode selected but it doesn’t seem to change anything? Any ideas? I am using a dark color theme, but when I change to the default It doesn’t work either.
Posted by Mike on Wednesday, 11th July 2012 at 12:58PM
This mode is based on the ‘Coda Bright’ stylesheet that comes installed with Coda 2 but it should work with all of the default schemes as they all use the same class names.
Posted by Mike on Wednesday, 11th July 2012 at 1:01PM
Michael, sorry to bother you with this! The problem was that I still had the CODA 1 syntax file in the same folder as yours. When I removed it the syntax highlighting worked for the CODA Bright stylesheet. I’ve been using a third party dark theme and it unfortunately doesn’t work with that. This is not your problem though! 😊 thanks again for creating this and for your help.
Posted by Mike on Wednesday, 11th July 2012 at 1:38PM
Thank you, this is great. I had this in Coda 1. Pumped to get it in Coda 2 now.
Posted by Mike on Wednesday, 11th July 2012 at 3:21PM
Thank you!
I actually installed coda 1 on Monday due to be there not being EE syntax and its buggy as hell! Disappinting from Panic!
Away to give this a try though and put up with the bugs!
Install instructions would be great as well,
Thanks again!
Posted by John Macpherson on Wednesday, 11th July 2012 at 4:25PM
Thanks for putting this together Mike… I too tried this and ended up scratching my head for a while. You’d think Panic would have released some sort of documentation for this, no?
Posted by Nuno Albuquerque on Wednesday, 11th July 2012 at 9:35PM
I know - I searched for ages for any clue as to what I should be doing but in the end it came down to trial and error and picking existing modes apart. As a result its not perfect but its definitely better than nothing and I’m glad that others are finding it useful as well. Thanks for all the comments.
Posted by Mike on Thursday, 12th July 2012 at 7:00AM
Big thanks for putting this together!
A small question, where I might be wrong.
In the commenting function, you are using the HTML-mode
If I’m not all wrong, the syntax {!——} is better within EE to ensure commenting?
/patrick
Posted by Patrick on Thursday, 12th July 2012 at 3:54PM
Hi Patrick. I totally agree, I really wanted the default commenting tags to be {!——} but in the time I had I couldn’t figure out how to change this. If anyone can fill me in me I’ll update it otherwise I’ll try and figure it out next time I have a chance to look at it.
Posted by Mike on Thursday, 12th July 2012 at 4:00PM
Thank you so much, was searching everywhere for this!
One question, I am using Coda Bright, but have customised the colours in the preferences. However I have not been able to change the colours for your mode. I looked in the package contents, and changed any colour values I could find, but no luck, it just displays red at all time. Any idea? or perhaps you could explain how to edit the colours in the mode?
Thanks again!
Posted by Chris Davies on Thursday, 12th July 2012 at 7:24PM
Hi Chris. The Hex values in the XML file aren’t actually how Coda 2 sets the colours anymore (they are used for Coda 1 I think). To change the colours you need to duplicate a default stylesheet and edit the CSS classes directly. I ran through the process in a comment 11 up from this one so hopefully that’ll give you the idea.
Posted by Mike on Friday, 13th July 2012 at 12:04PM
Thanks for your work on this, this will be really helpful in my future projects!
If I may make a suggestion, since a lot of EE tags match PHP conventions, maybe you could use the same colors where applicable. For example, EE variables and if/else statements could use the same colors as their PHP counterparts.
I say this because I’m using the “Specials Board” dark color scheme which makes the EE tags look like string data, and channel:entries tags look like syntax errors.
Thanks for sharing your work!
Posted by Matt on Tuesday, 17th July 2012 at 2:28PM
Hi Matt, Thanks for your suggestion. I can see your point that the colours would be better replicating PHP when using specials board. It may be better for me to create a dark stylesheet for use with this syntax mode. I’ll try and take a look at this next time I get a chance and post it.
Posted by Mike on Friday, 20th July 2012 at 4:22PM
Thanks for putting this together!
Posted by Ikaika Hussey on Friday, 27th July 2012 at 2:17AM
Updating to Coda 2.0.2 seems to have broken the syntax mode. Boo! I had a poke around the files to see if there was anything obvious to change, but couldn’t find anything. So I posted in Coda’s Google Group. Hope it might be possibly somewhat helpful!
Posted by Mazil on Friday, 3rd August 2012 at 12:31AM
Thanks for the warning Mazil. I’ll try and take a look at it once the Coda update is available via the App store which knowing Apple may be some time!
Posted by Mike on Friday, 3rd August 2012 at 6:23AM
The syntax mode is now updated to work with Coda 2.0.2.
Posted by Mike on Saturday, 4th August 2012 at 6:28AM
You rock! Awesome! Thank you so much for doing this, I was just like do googling almost daily for it 😊
Posted by Sven Tilburg on Saturday, 4th August 2012 at 7:02PM
Sweet! Thanks very much :D
Posted by Mazil on Sunday, 5th August 2012 at 11:52PM
I was looking for an editor for Expression Engine templates as converting a site from raw PHP to EE-based templating….was beginning to get painful and daunting to look at.
Trying out Coda 2 now thanks to your syntax mode. Wonder if they could cut you some credit somehow if I end up buying? 😉
Thanks for this =)
Posted by Abed on Tuesday, 2nd October 2012 at 5:16PM
Really useful thanks for this.
Posted by James Curran on Thursday, 8th August 2013 at 8:37PM
Hi. I’m running Coda 2.0.11, and have not been able to get the mode to work. I relaunched at reinstall. Have you noticed problems with 2.0.11? Do you have any troubleshooting suggestions? Thanks in advance!
Hi Maria, I’ve just upgraded to v 2.0.11 and it still seems to be working for me so I’m not entirely sure. Is the EE syntax mode option showing up for you under Text > Syntax mode > ExpressionEngine or is nothing showing at all?
Posted by Mike on Thursday, 31st October 2013 at 8:11AM
Coda 2.5 has just been released!
The mode doesn’t seem to work anymore….
Posted by joe on Thursday, 23rd October 2014 at 8:28AM
Hi Joe. I think it should work fine albeit with a few minor highlighting changes. I found I needed to re-enable the syntax mode and set it as my default for html files again. Hope that sorts it!
Posted by Mike on Thursday, 23rd October 2014 at 8:45AM
I’ve just updated to Coda 2.5. I managed to get this working almost – I followed your instructions above. All looks great except channel:entries tags get highlighted red – as in white text on a solid red background – which makes them look like errors. I don’t seem to have a Library > Application Support > Coda 2 folder so not actually sure where this plugin has gone! Any help would be appreciated – this plugin has been a huge help for me!
Posted by Frank Harrison on Friday, 31st October 2014 at 12:31AM
Hi Frank, Yes - I think that is the main difference after the upgrade. I may delve back in at some point and add any new EE tags etc.. that have been added since I released the plugin and take a look at the rather over highlighted channel entries tag. I don’t have the opportunity right now but I’ll add it to my to-do list!
Posted by Mike on Friday, 31st October 2014 at 8:44AM
Thanks Mike. Do you know if Coda 2.5 has moved where it stores plugins? I’d be happy to try editing your one, but I can’t seem to find it!
Posted by Frank Harrison on Friday, 31st October 2014 at 9:48AM
Hi Frank. OK - I have also created an alternative .sss file that will remove the background on the channel tag (in the article). Just download the file and drag it on to your Coda 2 icon on the dock . It should open a menu on Coda where you can select ‘Coda EE2’. You can always tweak the colors manually from this panel if you want. I have also updated the syntax mode to include a few newer EE tags.
Posted by Mike on Friday, 31st October 2014 at 11:50AM
Amazing – thank you!
Posted by Frank Harrison on Friday, 31st October 2014 at 12:14PM
I may be wrong, but I’m pretty sure that the download button which says v1.3, with the update for Coda 2.5, is actually giving me v1.0.
Posted by Eric on Tuesday, 2nd December 2014 at 4:48PM
I think that the lack of version number on the zip may have caused confusion. It is the latest but is named the same as the original. I have amended the zip file name to make it clearer.
Posted by Mike on Tuesday, 2nd December 2014 at 5:03PM
Not working for me in Coda 2.5.1
Installed in User > Library > Application Support > Coda 2 > Modes
Restarted Coda, the EE tags are not highlighting.
Posted by Daniel on Thursday, 4th December 2014 at 1:30PM
It should work. In Coda 2.5 you also need to enable it from coda > preferences > plugins. Hope that does the trick.
Posted by Mike on Thursday, 4th December 2014 at 2:57PM
When installing it, it shows the 1.0 version installed and I don’t get any syntax highlighting.
Shouldn’t it show 1.3?
Posted by Jason on Tuesday, 10th February 2015 at 6:21PM
Hi Jason,
Try re-downloading it now.
Mike
Posted by Mike on Tuesday, 10th February 2015 at 7:43PM
After trying a few times Coda only ever displays version 1.0 as installed, not 1.3. Any ideas?
Thanks a lot for your work on this, it’s a life saver, I hope I can get it working again on Coda 2.5.8.
Posted by Matt on Monday, 20th April 2015 at 12:40PM
Hi Matt. I’m running it on 2.5.8 without any issues. Make sure you delete the old .mode file before re-downing and installing. It might be worth right clicking on the ExpressionEngine .mode file, selecting ‘Show package contents’ and drilling down until you see info.plist which will states which version it is just to be sure.
Posted by Mike on Monday, 20th April 2015 at 1:43PM
A tip if people are running into trouble, set the syntax mode for a file to ExpressionEngine: Text > Syntax Mode > ExpressionEngine
Posted by Greg on Friday, 4th March 2016 at 1:54PM
I count myself as being fairly proficient with Photoshop but at the same time I am sure there are a lot of very basic techniques that I am unaware of and until recently this was one of them. Whilst there are a few different ways to achieve HTML curved corners for your website including javascript methods and CSS3, for those clients who insist that their site looks identical in every browser the only reliable solution is to use 2 background images on an outer and inner element.
I have always been convinced that creating these graphics should be very simple to do in Photoshop and as it turns out they are, but for years my half-hearted Google searches came up with nothing satisfactory and I was left using rounded marquee fills or importing vectors from illustrator, neither of which were particularly quick or satisfactory to look at.
My New Years resolution was to find out how to do this properly in Photoshop and to write it up in case anyone else is struggling with the same problem. The answer is embarrassingly simple.
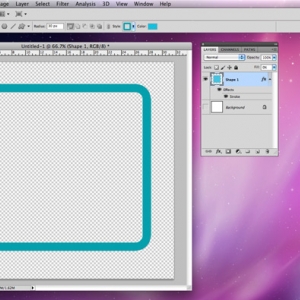
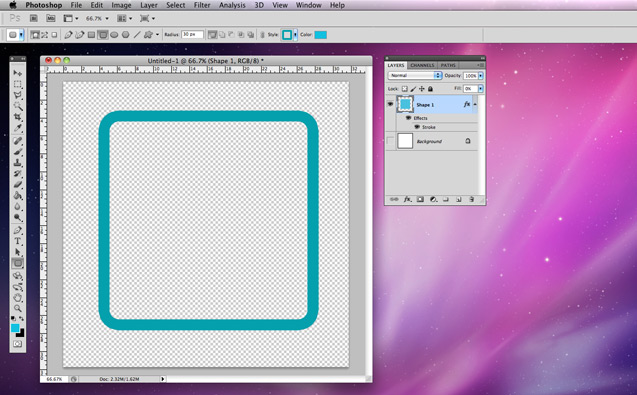
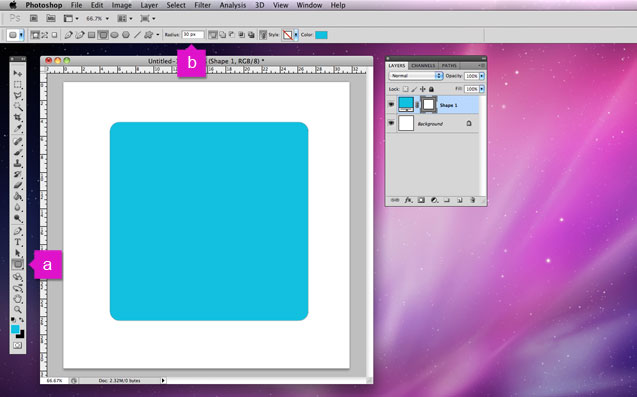
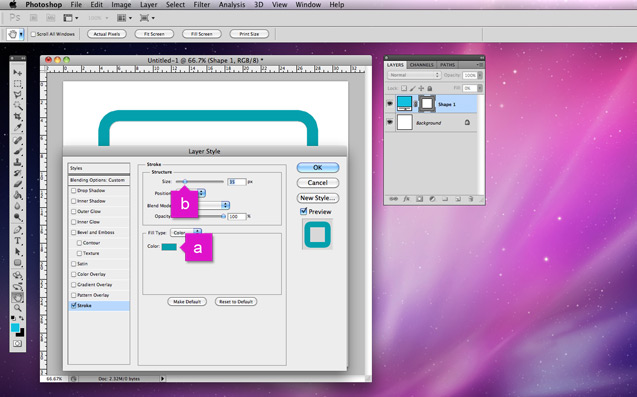
1. Create a new document and draw a rounded rectangle (a) setting the corners to the desired radius (b).
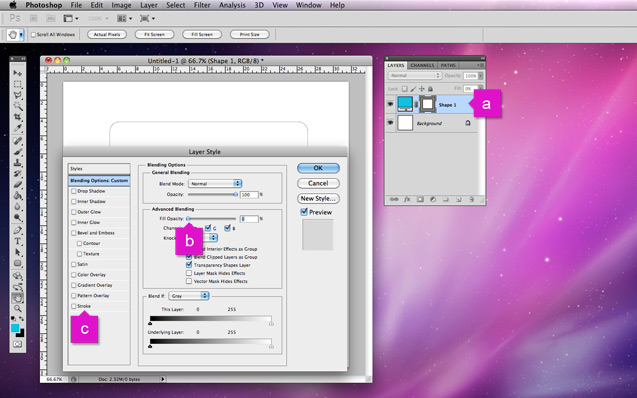
2. Double click the new shape's layer (a) to open the layer style dialog box. Reduce the fill opacity to 0 (b) and open the stroke panel (c).
3. Alter the stroke colour (a) and size (b) to your requirements and click 'OK'.
4. Rasterize the layer containing your shape and you're done! A hollow rounded rectangle to be sliced up and used for your backgrounds.
Comments (closed)
Just what I was looking for. Great tip and so easy! THANK YOU!!!
Posted by = on Friday, 25th May 2012 at 5:37PM
thank you for the great tip. just a thing a was looking for
Posted by yokpok on Sunday, 23rd November 2014 at 9:11PM
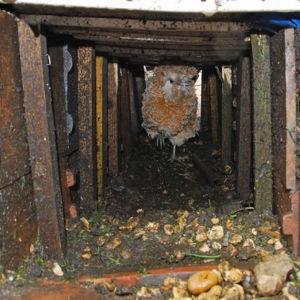
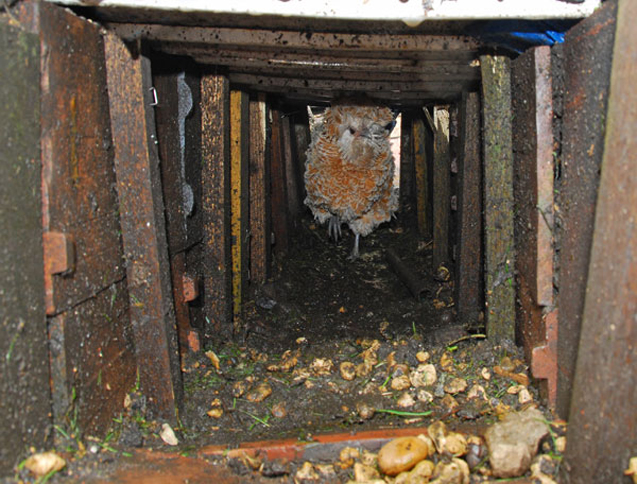
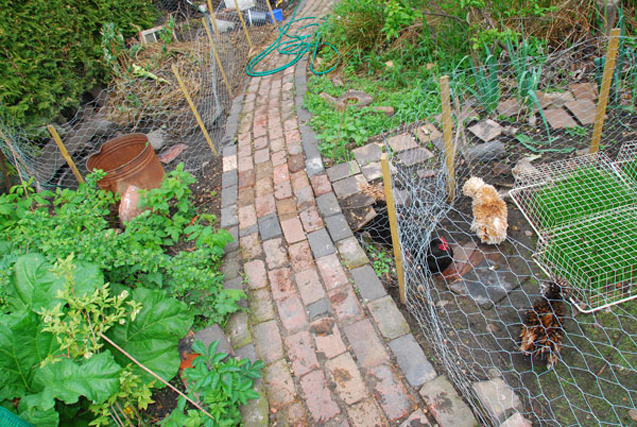
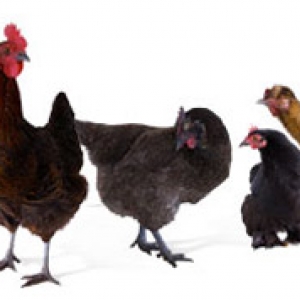
In my quest to integrate our birds with our garden I decided it was time that they were confined to two areas of the garden. The problem was that the two areas that they needed access to, the chicken house area and the duck pond area, are on two different levels and separated by a footpath. The obvious solution was a tunnel so I set about digging, unsure as to how well birds cope with tunnels. It turns out they cope really rather well.
The tunnel spans a length of about 2.5 metres and is supported on either side by a series of large roof tiles which are retained by wooden stakes. The roof of the tunnel is a metal frame with wooden panels, covered in earth and a brick path.
The chickens had a few days with the tunnel uncovered to get used to the new route to the pond and compost heap. A few needed some gentle persuasion that it really was a good idea, but they all got there in the end and now shoot down at a rate of knots.
Comments (closed)
You Rock!!! I am adding a subterranean chicken/duck tunnel between my coop and my run and am stoked to see how happily your birds go though it!!! Much thanks for sharing!
Posted by Rockflower Farm on Wednesday, 20th February 2013 at 3:31AM
They thought I was crazy suggesting this and now I have evidence they’ll all be in awe
Posted by Matt Davis on Sunday, 22nd December 2013 at 4:32PM
This idea crossed my mind and I just happened to come across this by chance. It is a good concept but I would put concrete down to minimize the mud in the tunnels.
Posted by anonymous on Tuesday, 24th March 2015 at 1:35PM
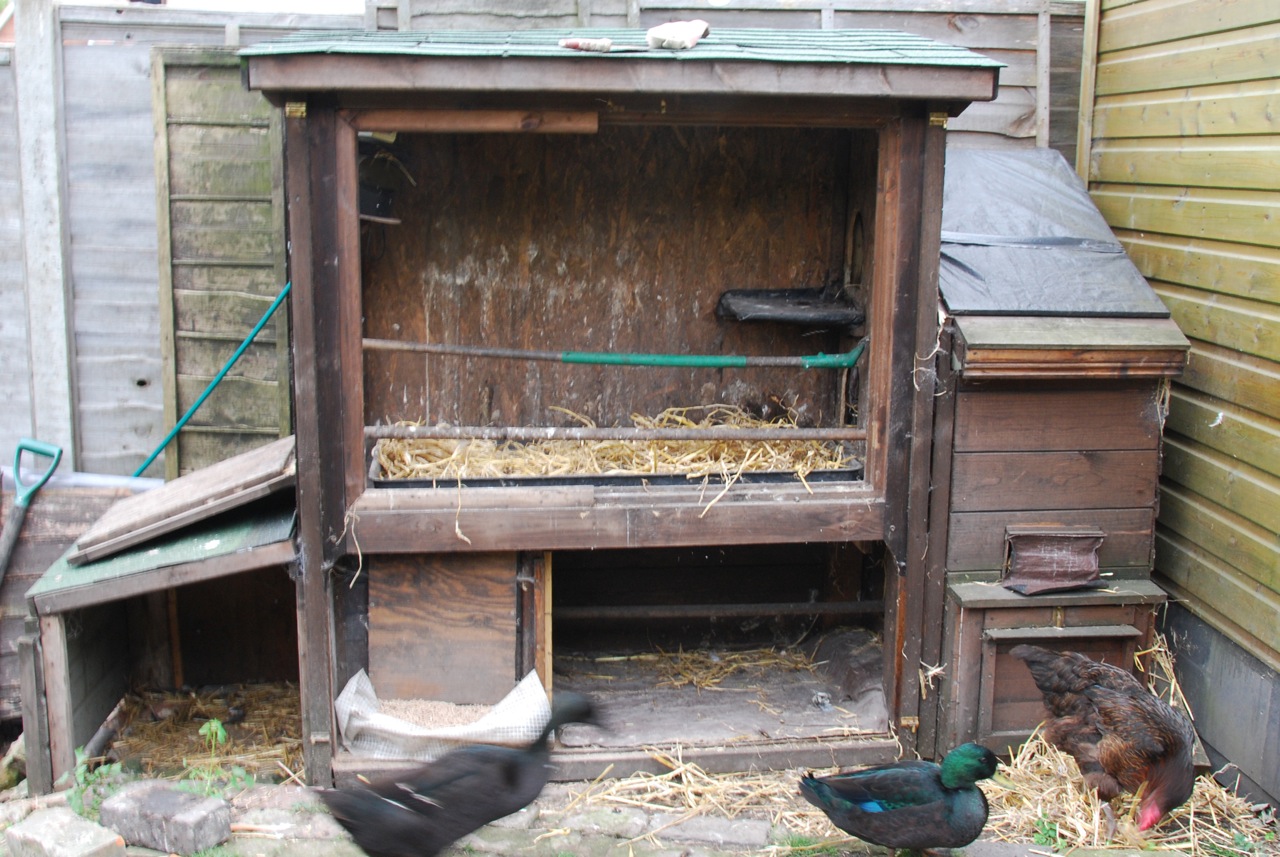
My decision to try and make our chickens and ducks fully automated came just before we headed off for a three week holiday. We decided that rather than paying someone to come each day we would invest the money in fully automating them with automatic doors, an on-demand feeder, fresh water and a diy swiveling web-cam to keep an eye on it all . Since taking the plunge, the system has operated flawlessly for over a year without even needing the batteries changed so I thought it was worth sharing how I transported our birds to Chicken house Nirvana. Read on to find out how I tackled it.
During daylight hours there’s not much going on so below is a recording of the Chickens coming in to roost as it starts to get dark.
Building the Chicken House
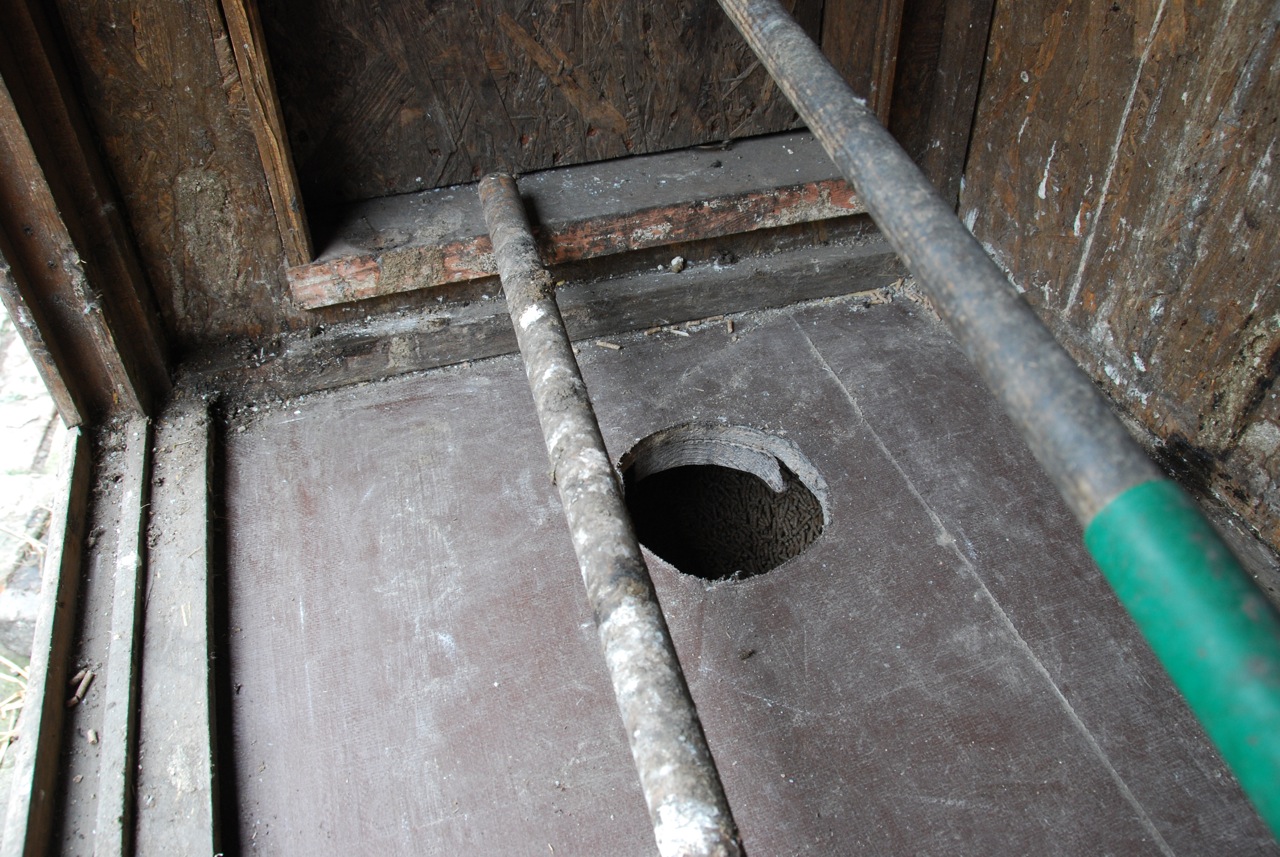
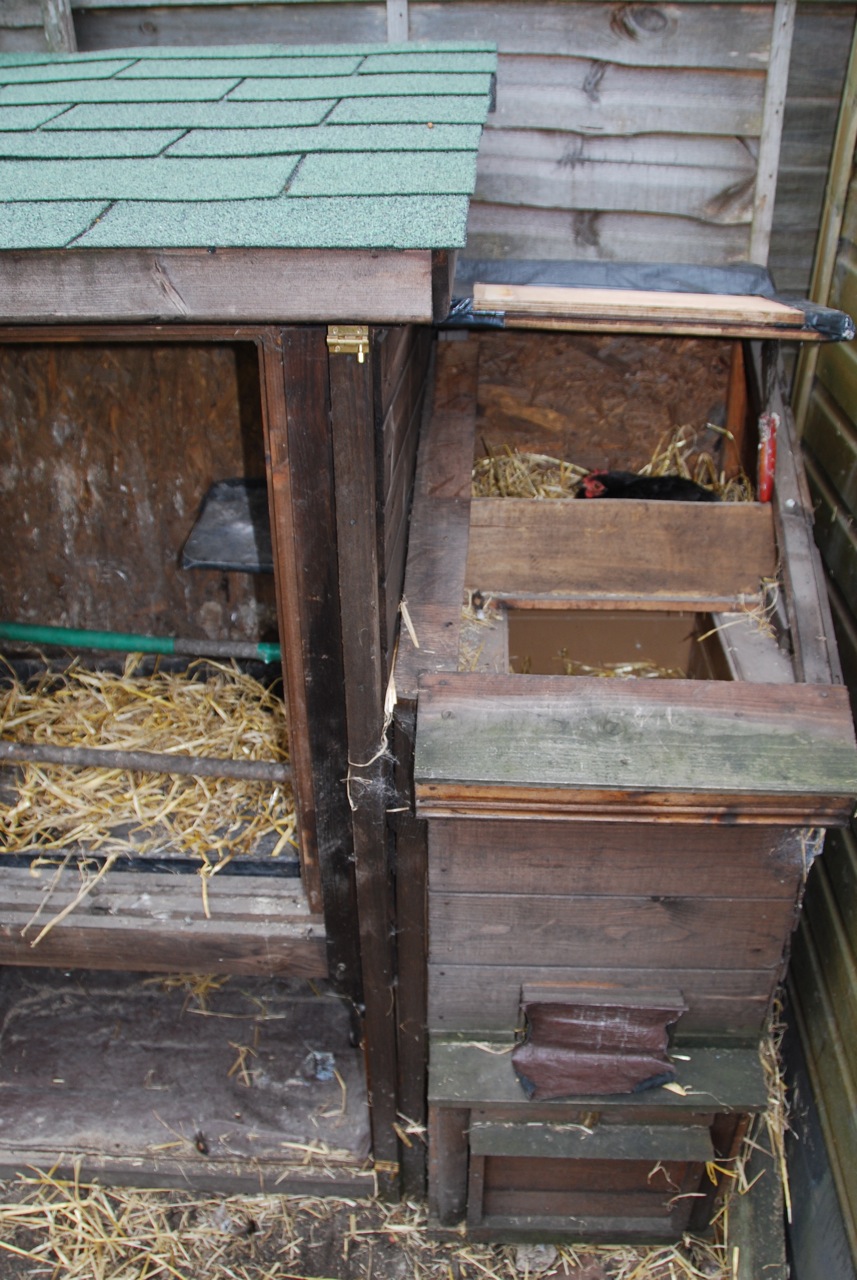
I have been building our chicken house in my spare time since 2007, using a combination things I find in skips and and leftovers donated by our neighbor who is carpenter. By the time I started the automation process in July 2008 the chicken house consisted of an upstairs with a perch for our 7 chickens and two rooms downstairs, one for our two ducks and another which had been converted into a fully sound proof box for our cockeral, Biddy. Following a tragic incident in which Biddy decided to follow the ducks into the pond, his box had become vacant so out came the brick lining, bubble wrap and insulated cladding and in went a plastic liner and several sacks of Chicken food. Biddy’s pad was now the feeder. Leaving a small gap at the bottom, I attached a closure plate to the front of the chamber to allow just a small amount of food to drop down as required by the birds.
My first move in the automation process was to order the doors and closing mechanism. There isn’t much choice when it comes to automatic poultry door mechanisms so I settled on the VSB system which I purchased from Wiltshire Chickens online shop. I decided to get one VSBb mechanism, three VSB sliding doors and a VSB 24hr timer. This door mechanism is light activated by default, which is great for chickens but our ducks love to stay out late so a timer was essential to give full control. In order to link up more than one door I needed to employ a couple of pulleys which can be ordered online but I decided to fashion my own from standard pulleys.
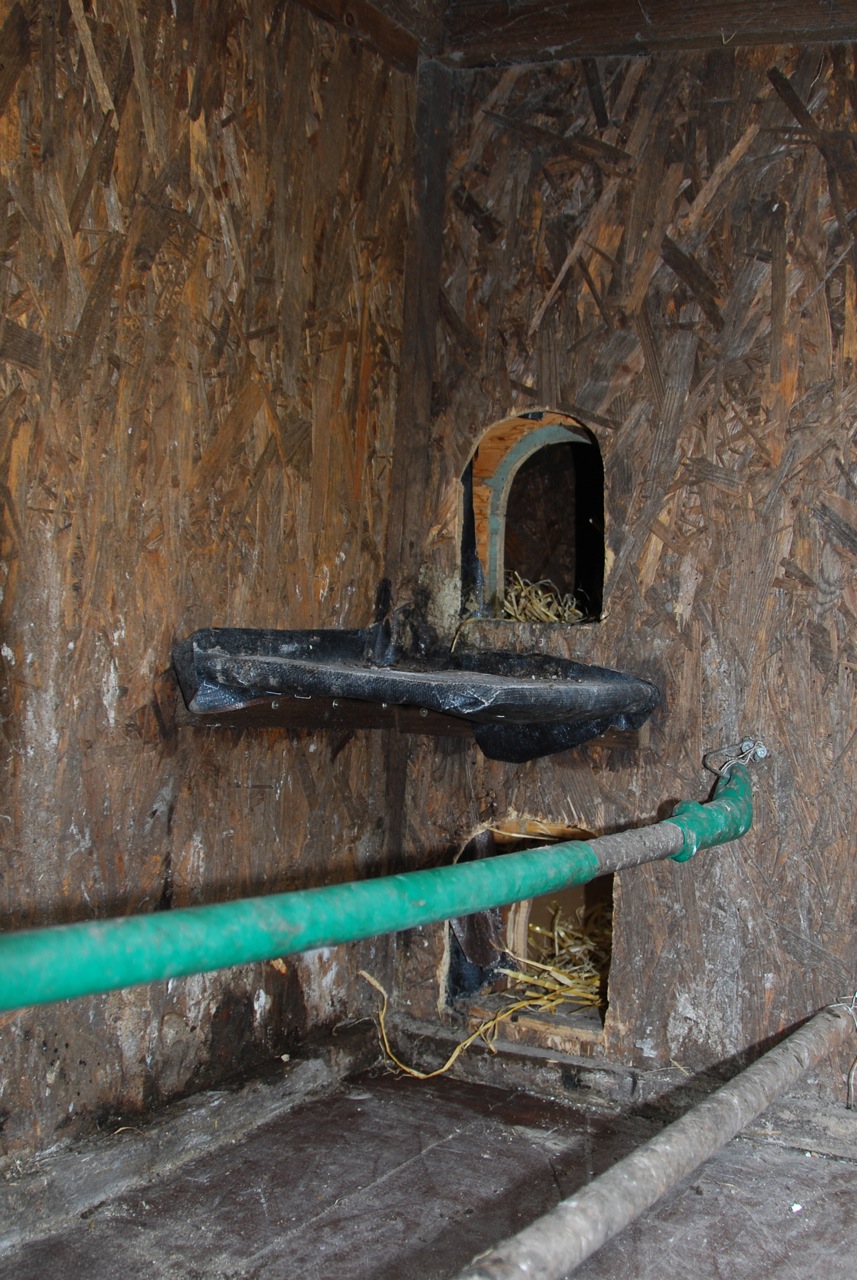
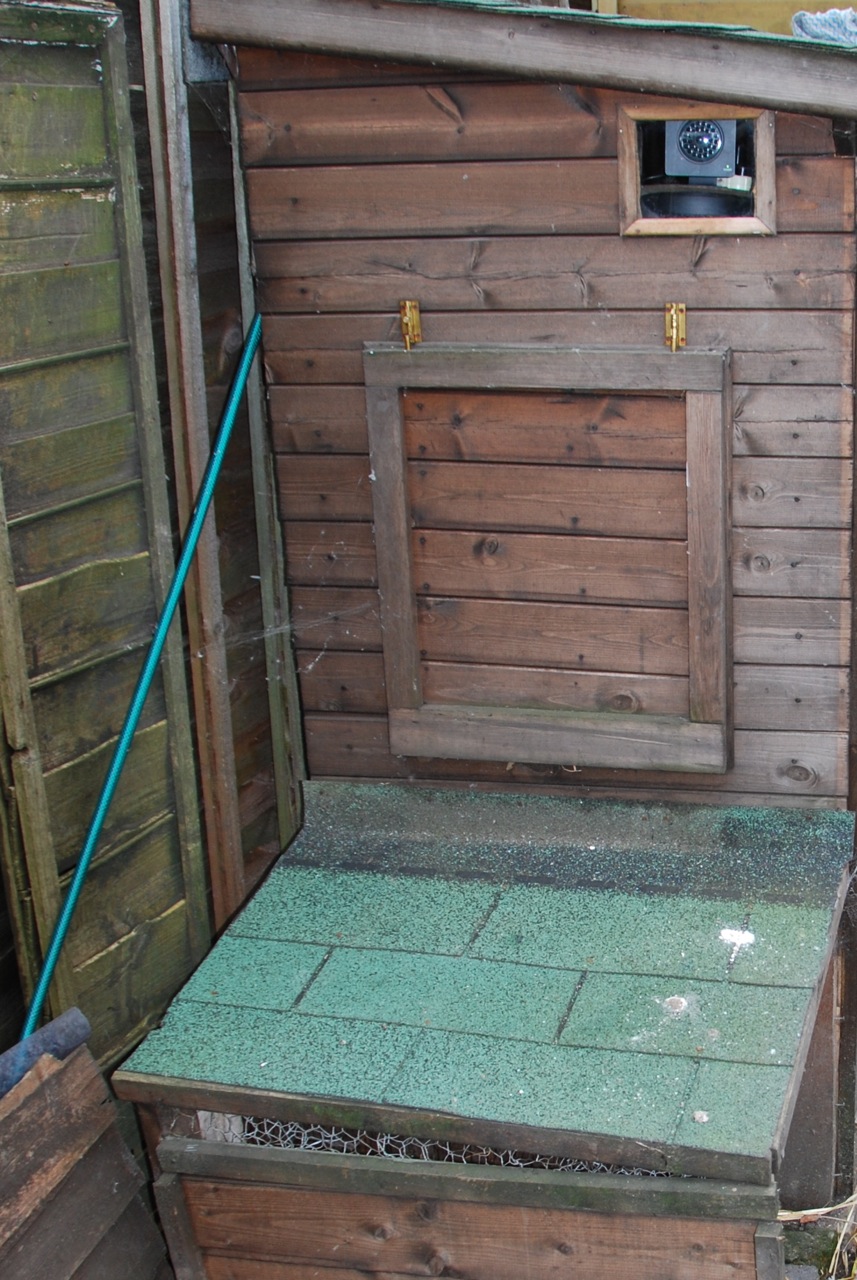
In order to give full access to the different sections of the chicken house for mucking out etc.. I mounted the sliding doors on a large removable plywood panel that bolted in place over the entire face of the chicken house. Having cut three rectangular holes in the panel, the metal doors slotted into runners mounted either side of each entrance and the mechanism box was secured at the top. Pulleys were attached to either side of the upper main chicken house door which guided lengths of plastic coated framing wire from the bottom corners of the upper door to the two lower doors causing them all to rise and fall in unison. Once the doors were all in place and wired up all that was left to do was attach the main upper door to the automatic mechanism which was in turn connected to the timer module mounted on the inside of the panel.
The result was three fully automatic sliding doors, one at the top with a platform for the birds to fly up on to, one at the bottom for the ducks and one next door to protect the feeder from vermin at night. I set the timer to close an hour or so after dark and to open just after sunrise.
The watering system came courtesy of a Hozelock AC1+ automatic watering module which topped up both the duck’s pond and the chicken’s drinker. I set it to turn on the hose for 2 minutes twice a day which was enough to keep the duck’s water from becoming too stagnant and provide ample water for the chickens.
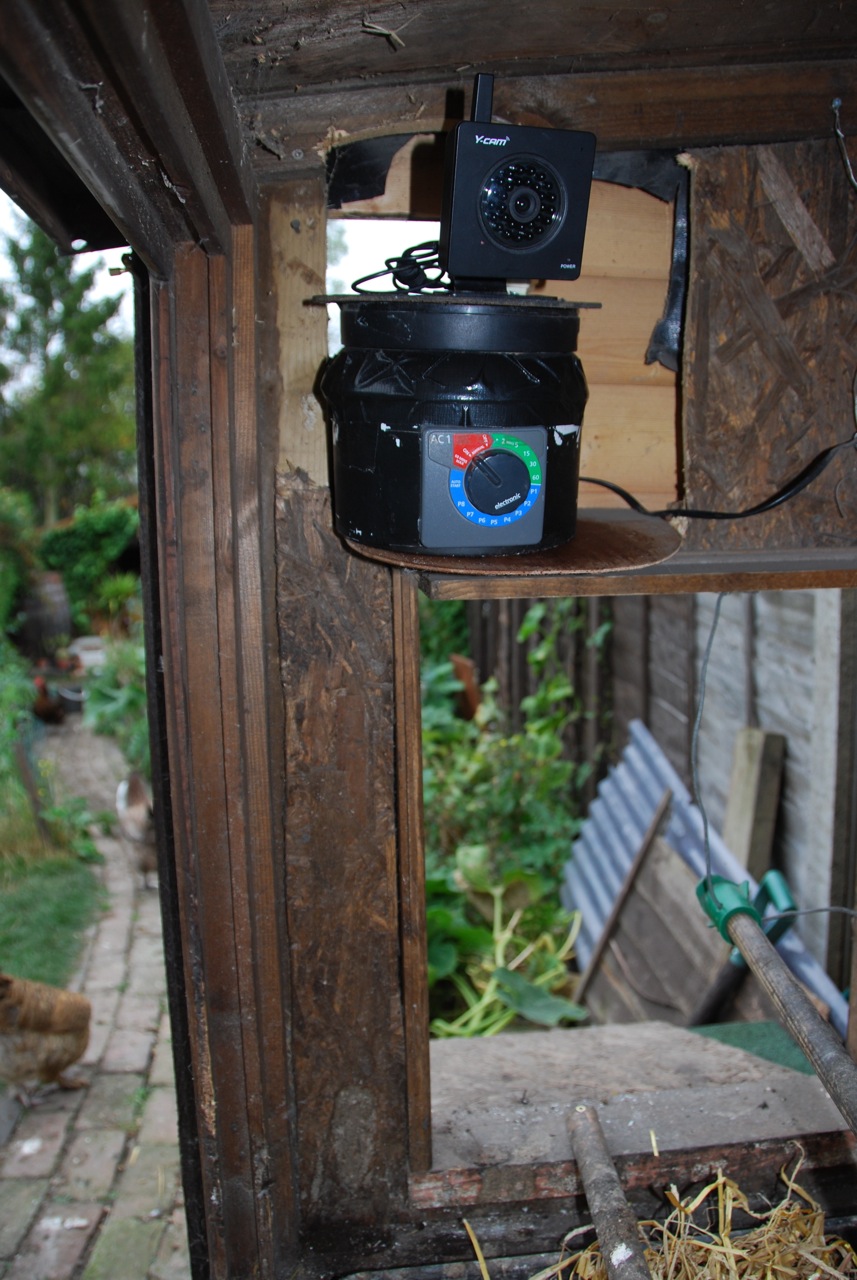
Finally I needed to be able to monitor the setup over the internet to make sure it was all working smoothly. For this I turned to a Y-cam infra red wireless webcam mounted on a small platform inside the main chicken house. Because I wanted to be able to view them both outside during the day and inside at night, I developed a swiveling platform which looked down on the perch at night using it’s infra red night-sight, monitor whether the door had closed correctly, then swung round during the day to peer through a glass window looking out over the garden. The platform itself was entirely comprised of bit’s and pieces I found lying around and could be set to swivel at set intervals. The full design for this is probably a bit too much for this article so maybe I’ll cover it in a separate post in the future, let me know if this would be useful.
I hope this has inspired you to automate you chickens if you have them or to consider getting some if you don’t. We live in a built up area surrounded by other houses and we have found them to be excellent pets that require little in the way of daily maintenance and offer eggs and animation for the garden in return. Apart from filling their food every couple of months and changing their straw now and again all that’s left to do is eat the eggs. If you have any innovative chicken house adaptations that might inspire me I’d love to hear about them but in the mean time you can have a look through some more of my pictures.
Posted by mark on Sunday, 19th September 2010 at 12:55PM
You have both inspired and impressed me. How the heck were you able to soundproof the room and did you ever have any problems with any birds staying outside after the doors have closed for the night?
Posted by Davis Freeberg on Sunday, 21st August 2011 at 4:59PM
Thanks Davis. I actually used a layer of old cotton clothes about 5 inches thick followed by a skin of bricks followed by wood. The walls were about 10 inches thick by the end and you could really hardly hear him once he was shut in. He was never too please about being separated from his lady friends though!
I don’t think any of the birds have ever stayed out past closing time but the ducks could be a bit of a pain.
Posted by Michael Sibley on Sunday, 21st August 2011 at 8:10PM
That is ingenious, but do you think that one could make it work on a larger scale? It seems like it would be easy enough to build the sound walls around an entire coop if you had a good foundation, but I’m wondering how one would go about soundproofing the roof as well.
Posted by Davis Freeberg on Sunday, 21st August 2011 at 10:37PM
I think that should work although I agree a brick roof would be tricky. I’m not sure what would make a good lightweight acoustic insulator as when I was researching by cockerel box, most sources said density and weight were the key. Maybe the egg box trick?
Posted by Michael Sibley on Monday, 22nd August 2011 at 6:15AM
Wow.. I found your site by image search for automatic chicken door.. and now I’m green with envy..
I’m going to try and replicate .. your removable door idea.. and I’d like to have the chick cam.. but I know nothing about those types of electronics.. but i do have a techie friend..
Just as a thought .. if you had made it a little bigger.. or were going to do it again.. would you have made any modifications??
I’ve got to say with the chicken tunnel and the house you’ve designed… I’m going to have to look at your web page design.. I bet their really good too..
Thanks so much for putting this up on the web… its just what i needed for inspiration.. / and to show my friends who’ll help me build… (oop s just checked the price on the Ycam.. may have to postpone that for a later addition..)
Posted by Debra from Dodge on Wednesday, 15th February 2012 at 1:54AM
Thanks Debra - glad you got some inspiration. In terms of doing anything differently, I think it more or less fulfills my needs now although it did start out very differently from how it ended up and under-went several rounds of modifications on the way. I know what you mean re. the price of the y-cam. It was a surprise Christmas present for me so I didn’t have to make that choice so maybe you should start dropping hints! Good-luck with your house.
Posted by Mike on Wednesday, 15th February 2012 at 8:32AM
Michael, this is fascinating! I was just getting over the fact that you’d had the genius idea of sound proofing the cockeral’s enclosure (one of the reasons I’ve hesitated about chickens in the past) when you hit me with the tragicomedy (sorry) moment of him following the ducks into the pond!
I considered getting chickens when I moved out of London 18 months ago but did a little intro course to it and thought it sounded a bit too much to take on. It was the cleaning out the coop and worrying about red mite and other parasites/insects (I found one on me when I got home after holding one) that mostly put me off, but wondering what to do when we go away was a bigger concern. You’ve proven that this doesn’t need to be a problem.
Once I’ve got my allotment in better shape (beginning of year 2, it IS a lot of work!) I might consider chickens again.
Posted by Emily Heath on Tuesday, 1st May 2012 at 10:10AM
Go for it Emily - it really doesn’t need to be complicated. Are chickens are virtually wild and seem very healthy and happy.
The sound proof box was very effective but towards the end I was having to stop work to put him in it every couple of hours which was a pain for both of us. We live further out of town now so we are hoping that this years hatch will have a cockerel in it to bring some comedy to the garden - they are seriously fun!
Posted by Mike on Tuesday, 1st May 2012 at 4:26PM
Hi,
I’ve had three ducks now since last April here in Rugby, Warwickshire. As you say in your conclusion, they make very good pets and just started to lay prior to the winter setting in, so we are looking forward to a summer with lots of eggs in 2013.
However, I have been thinking about the ‘baby sitter’ problem and have so far relied an a friendly neighbour to help out whilst we are away. Your piece is very good. I will probably buy a vsb with timer but I couldn’t help but be amazed at your fully automated setup. It’s inspiring!! Thank you!
Posted by Jez on Thursday, 27th December 2012 at 8:47AM
Hello, congratulations you are amazing, I jus wondering if I can make a electric door for my chicken house and The feeder is well could you help me or you can build this for me? you are so good you should do some business with your hard work and great imagination.
Posted by Monica on Thursday, 9th May 2013 at 6:05PM
Hi Monica. Thanks for your comment - you are very kind. I bought the doors and mechanisms from a shop near me in Dorset called Flyte So Fancy and they sell them online too. http://www.flytesofancy.co.uk/chickenhouses/VSB-Automatic-Door-Opener.html. They are incredibly easy to install and the batteries last for years so definitely worth the effort!
Posted by Mike on Thursday, 9th May 2013 at 6:49PM
Nice work! As a single working parent I thought long and hard about realising my life long dream of keeping chickens,but it’s worked out well -with the aid of vsb and my coop/large chicken run in a nettle infested patch of my garden. As I hoped, the chickens have totalled the hitherto untamable nettles and also have a spaciousrun for when I am not able to free range them.
I’m fascinated by your duck set up; I thought ducks didn’t put themselves to bed - but they do?
Posted by Tania thorn on Thursday, 20th February 2014 at 10:09AM
Thanks for the comment. It depends on the ducks I think - we have had some that do and some that don’t put themselves to bed. Our most reliable duck to go in at dusk was raised with chickens and just did what they did but in the end this didn’t turn out too well as he became a bit to friendly with some of the chickens.
Posted by Mike on Thursday, 20th February 2014 at 11:38AM
Thank you for all this information. We need to do the same thing! Hoping my husband can get some idea from you on how to set up an automatic door for our ducks. Thanks again.
Posted by Sharon on Wednesday, 2nd July 2014 at 2:47PM
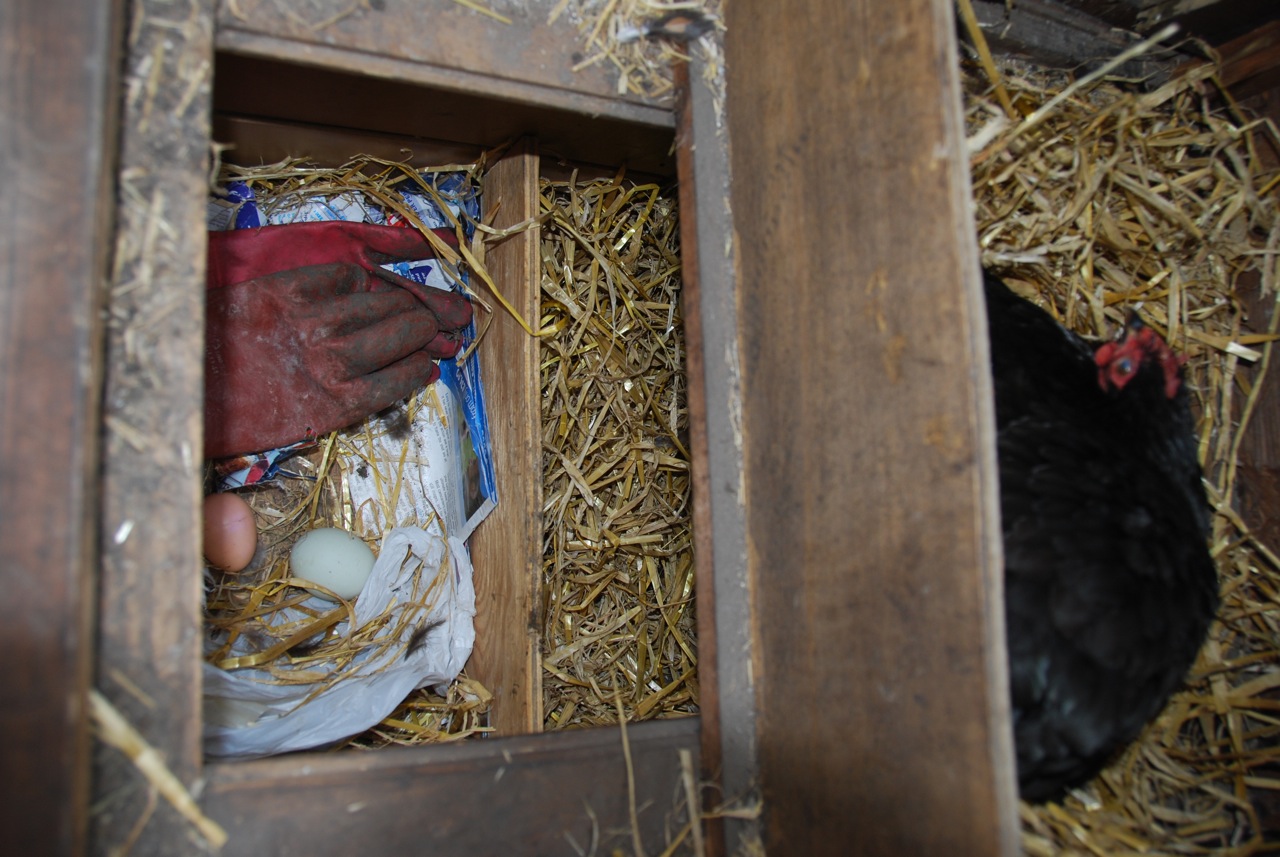
Hi I wondered if you had someway of dealing with the eggs whilst you were holiday rather than needing someone to collect them? I have everything else automated but have yet to find a way of stopping an overloaded collection of nest boxes…esp with 14 hens.
Posted by Lucia on Tuesday, 15th July 2014 at 9:01PM
Hi Lucia, Thanks for your comment. We only have a few in there at the moment and luckily our neighbours like eggs. You need to develop some sort of Wallace and Grommit style system to remove the eggs and preferably turn them into cakes ready for your return!
Posted by Mike on Wednesday, 16th July 2014 at 8:48AM
Wow, best automatic chicken coop and very creative. You only use leftovers to build this chicken house. I am so impressed specially about the design. Great work, Mike.
Posted by Jordan Walker on Thursday, 7th August 2014 at 2:32AM
I really like the idea to automate chickens. I think this will provide the best solution to keep them safe in a well mannered. Nice work guys.
Posted by Jennifer on Thursday, 21st August 2014 at 10:05AM
Nice. I am on the same path. I bought a £20 heron jet sprayer and converted it to spray whenever the ducks walked through the PIR field. This has served to not only give Sid, Mary and Alice a refreshing shower whenever they want but is fills their water bowl at the same time. I will be getting an auto duck door so as I can have the occasional lay in. Mine light to stay up late too!
Posted by Steve Wood on Tuesday, 19th July 2016 at 3:00PM
Incredible. Been thinking about how to do this for ages.
Don’t have any ducks yet but I want some now so may have to dig a pond as well!
I know you sourced mostly from scrap but what do you reckon total all in cost and man hours to build from new with the motors?
Posted by Rafe on Monday, 7th November 2016 at 8:14PM
Hi Rafe. Really hard to tell as it evolved over several weeks but probably a couple of days in all. The majority of the house really was scrap and so didn’t ‘cost me anything but the auto door opener was definitely the expensive bit as it cost about £100. It was definitely worth it in my opinion though, as it is very reliable and the batteries last for literally years!
Posted by Mike on Tuesday, 8th November 2016 at 8:40AM
@Rafe
Ducks would love a pond but any sort of kiddy pool (the bigger the better) works just as well
Posted by Steve Wood on Tuesday, 8th November 2016 at 9:17AM


.jpg)